Introduction
Removing a Kohler shower handle is a task that may arise for various reasons, including maintenance, replacement, or repair. Homeowners and maintenance professionals alike may find themselves facing the necessity of disassembling the handle to access internal components. This process is crucial not only for ensuring the optimal performance of the shower but also for addressing any plumbing issues that may have arisen over time. Understanding the need for this task is essential, as it emphasizes the importance of being well-prepared and informed.
Common scenarios that necessitate the removal of a Kohler shower handle include leaking faucets, difficulty in controlling water temperature, or the need to replace a damaged handle. In many cases, the handle may become corroded or worn out, which can impede its function and efficiency. Furthermore, if you are upgrading your shower system or redesigning your bathroom, it is essential to remove the existing handle to install a new one seamlessly. Regardless of the reason for this need, it is imperative to follow the correct steps to ensure the handle is removed safely and without causing damage to the surrounding fixtures.
Before embarking on the process of removing the Kohler shower handle, it is advisable to gather the necessary tools and familiarize yourself with the specific model’s instructions. This preparation not only facilitates a smoother workflow but also reduces the likelihood of mistakes which could lead to further complications. Taking the time to understand the necessary steps will ultimately save both time and effort. Whether one is dealing with a simple repair or a more complex replacement scenario, having clear guidance makes the process manageable and effective.
Tools Needed
Removing a Kohler shower handle requires a few specific tools to ensure the process is carried out efficiently and without damage. The first essential tool is a flathead screwdriver. This tool is primarily used to remove any decorative caps or to pry off any covers concealing screws. It is crucial to select a flathead screwdriver that fits the width of the slot in the screw to avoid stripping the screw head.
The second important tool is a Phillips screwdriver. This type of screwdriver is particularly useful for handling screws that have a cross shape. Many Kohler shower handles are secured by Philips screws, and using the appropriate screwdriver will prevent damage to the screws, which can make removal problematic. A set of screwdrivers may be handy as well, as different screws may require varying sizes.
A wrench or an adjustable wrench is another vital tool in this process. Often, shower handles are held in place by nuts or bolts that require torque for removal. The wrench will provide the necessary grip and torque needed to loosen these connections without risking damage to the handle or surrounding fixtures.
In addition to these tools, it is advisable to have a towel or cloth nearby. This can be used to wrap around the handle or fixtures to protect the shower’s finish from scratches or damage during the removal process. Using a soft cloth can help to catch any small parts that may fall during removal, preventing loss and ensuring a smooth process.
By gathering these tools prior to beginning the removal, you can streamline the process, making it more efficient and reducing the likelihood of encountering complications along the way.
Identifying Your Kohler Shower Handle Model
Understanding the specific model of your Kohler shower handle is paramount before initiating the removal process. Kohler, a reputable brand renowned for its quality and durability, offers a variety of shower handle designs. Each model has its unique features, and being aware of these variations can make the removal process smoother and more efficient.
The first step in identifying your Kohler shower handle model is locating the model number. This number is typically found on the handle itself or on the escutcheon plate. If the model number is not visible, it can often be found in the original packaging or installation manual. Additionally, checking the Kohler website or contacting their customer service can provide assistance in tracking down the necessary information.
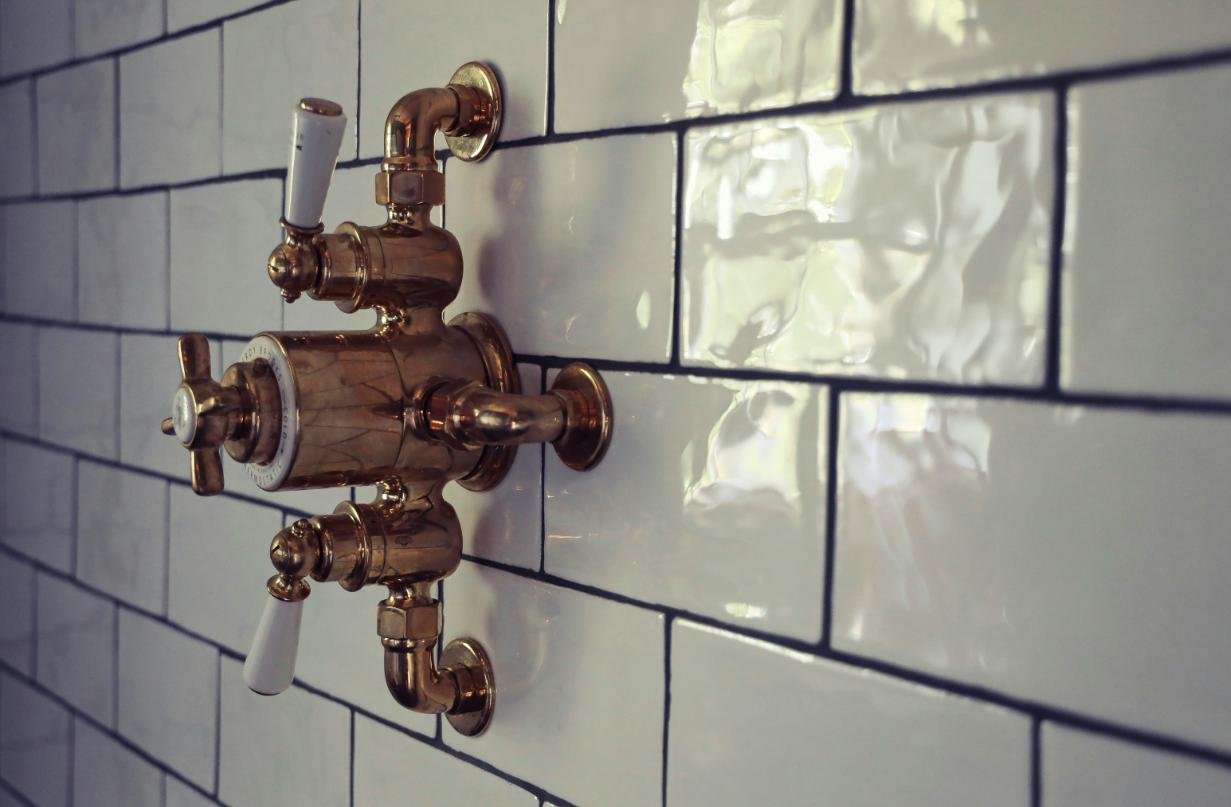
Kohler shower handles come in numerous styles, including lever, knob, and, more recently, digital controls. Lever handles are popular for their ergonomic design, while knob handles present a more traditional aesthetic. Alternatively, digital handles offer modern convenience, enabling precise temperature control and water flow management. Understanding these distinctions is essential when attempting to remove or replace a handle, as the techniques can differ based on the type.
Moreover, some Kohler models may require specialized tools for removal due to the specific way they are assembled. Familiarizing yourself with your shower handle type will not only aid in its identification but also help anticipate any challenges that may arise during removal. Through careful observation and inquiry, you can successfully pinpoint the Kohler shower handle model you are dealing with, ensuring a seamless and efficient removal process.
Preparing the Shower Area
Before embarking on the task of removing a Kohler shower handle, it is essential to prepare the shower area adequately. This preparation not only facilitates a smoother removal process but also helps in maintaining the cleanliness and integrity of the surrounding environment.
Begin by clearing the shower area. Remove any personal items, such as shampoos, soaps, and loofahs, from the shelves or ledges. This step ensures that you have an unobstructed workspace, allowing for more effective maneuvering as you work on the handle. Additionally, consider removing any mats or rugs that could become slippery or hinder your movements.
Next, it is important to protect the surrounding surfaces. Lay down a drop cloth or several old towels on the floor to catch any water drips or debris that may fall during the removal process. This precautionary measure will safeguard your flooring from potential water damage or scratches. If there are tiles or fixtures nearby that could be affected, cover them with painter’s tape or additional towels, creating a buffer against any accidental impacts or scratches.
Moreover, ensure that the area has proper drainage. If your shower is not designed to drain quickly, consider placing a bucket under the fixture or using a wet vacuum to handle any excess water. This is especially significant if you anticipate encountering water from the pipes while working on the handle. Having a clear plan for managing water flow can prevent complications and enhance your efficiency during the removal process.
By taking these preparatory steps—clearing the area, protecting surrounding surfaces, and ensuring proper drainage—you not only create a safer workplace but also increase your chances of successfully removing the Kohler shower handle without unexpected interruptions or damage.
Step-by-Step Removal Instructions
Removing a Kohler shower handle can seem daunting; however, with a clear understanding of the process, it becomes a manageable task. This guide will walk you through the steps necessary to safely detach your shower handle, enabling you to perform repairs or replace it as needed.
Start by gathering the necessary tools: a screwdriver (flathead or Phillips depending on the screws), an Allen wrench, and a towel to keep your workspace clean. Before proceeding, ensure that the water supply to the shower is turned off to avoid any accidents. Additionally, protect the shower’s surface by laying down the towel in the area beneath the handle.
The first step involves locating the set screw that holds the handle in place. Depending on the specific model of your Kohler shower handle, this screw may be located on the side or beneath the handle itself. For models with a decorative cap covering the screw, carefully pry this off using a flathead screwdriver. Take care to avoid damaging the finish of the handle or the surrounding area.
Once the set screw is exposed, use the Allen wrench or appropriate screwdriver to loosen it. Turn the screw counterclockwise, but be cautious not to remove it entirely unless necessary, as it could fall into the shower’s drain. After loosening the set screw, gently pull the handle away from the wall. If the handle resists removal, check for any additional screws that may be securing it, as some handles may have more than one set screw.
If the handle remains stubbornly attached, apply a small amount of penetrating oil to the joint where the handle meets the valve. Allow it to sit for a few minutes before attempting to pull the handle off again. Once detached, store the handle and screws in a safe location for easy reinstallation later. By following these steps methodically, you can successfully remove your Kohler shower handle without any issues.
Handling Difficult Situations
When removing a Kohler shower handle, various challenges may arise that could complicate the process. One common issue is overly tight screws, which can result in stripped heads or breakage. If you encounter such a scenario, it is advisable to apply a penetrating oil to the screws, allowing it to soak for a few minutes. This will help to loosen the rust or grime that may be contributing to the tightness. Utilizing the correct screwdriver type is also essential; a flathead or Phillips screwdriver should match the screw design for optimal torque.
In cases where the handle components are stuck due to corrosion or mineral deposits, gentle persuasion may be required. A rubber mallet can be beneficial for tapping the handle lightly without causing damage. Additionally, using a plastic lubricant can assist in easing the handle’s movement. Applying the lubricant around the base where the handle meets the valve can help dissolve mineral deposits and free the component.
Another potential issue could arise from trapped debris within the mechanism. To address this, it is advisable to examine the handle openings for any visible blockages. Cleaning the assembly with a soft brush can eliminate any debris and ensure smoother operation. It’s crucial to be patient during the disassembly process, as forcing parts apart could lead to permanent damage.
Should you find the handle still immovable, consider using a handle puller, which is designed specifically for situations like this. This tool exerts a steady and even pressure, helping to dislodge the handle without compromising any other components. Following these troubleshooting tips can significantly alleviate common problems encountered while removing a Kohler shower handle, allowing you to proceed with your plumbing project confidently.
Cleaning and Maintenance Tips
After successfully removing your Kohler shower handle, it is essential to prioritize cleaning and maintenance of both the handle and the surrounding fixtures. Proper care will not only enhance their appearance but also prolong their lifespan, preventing the accumulation of grime and mineral deposits that can affect functionality.
Begin by selecting a suitable cleaning solution. A mixture of warm water and mild dish soap is an effective choice. Avoid abrasive cleaners or scouring pads, as these can scratch the surface of the handle and fixtures, leading to potential damage. Soaking a soft cloth or sponge in the soapy water, gently wipe down both the handle and any exposed components, ensuring that you address all contact points where buildup may occur.
For stubborn mineral deposits or soap scum, consider using a vinegar solution. Mix equal parts of vinegar and water, then apply this blend to the affected areas. Allow it to sit for a few minutes to break down the buildup before wiping it away with a soft cloth. This method is particularly effective for areas where water hardness can lead to calcium deposits. Rinse thoroughly with clean water to ensure no acidic residue remains.
In addition to routine cleaning, regular maintenance checks are crucial. Inspect the shower handle and surrounding fixtures for signs of wear, cracks, or corrosion. If any damage is noted, consider replacing the affected parts immediately to avoid further complications. Lastly, apply a light coat of high-quality silicone-based lubricant to moving parts, if applicable, to keep them functioning smoothly.
By following these cleaning and maintenance tips, you can help ensure that your Kohler shower handle and its fixtures remain in excellent condition, providing you with both aesthetic appeal and reliable functionality for years to come.
Reinstallation of the Shower Handle
Reinstalling a Kohler shower handle is a crucial step to ensure the proper function of your shower system. After successfully removing the handle, it’s essential to follow an organized approach for reinstallation. Start by gathering all components you previously removed, including the handle, screws, and any decorative plates. Before beginning the reassembly, inspect all parts for any signs of wear or damage; this can prevent issues during usage.
Begin by positioning the handle onto the valve stem, ensuring it aligns correctly with the splines. This alignment is critical, as improper placement may result in handle slippage or difficulty turning the water on and off. Once the handle is in place, secure it using the screws you removed earlier. It is advisable to tighten the screws gradually. Using a torque wrench can help ensure that the screws are snug but not overly tightened, which could damage the components.
After reinstalling the handle, it is vital to check all connections to confirm that they are properly secured. Turn on the water supply slowly while observing the handle’s movement and looking for any leaks around the assembly. If any leaks are detected, it may indicate that a connection is loose or a washer needs replacement. Conducting this check-up procedure can help identify issues before they lead to more serious problems, ensuring your Kohler shower operates efficiently.
In closing, the reinstatement of your Kohler shower handle requires careful attention to detail. Following the outlined steps will not only enhance your experience but also prolong the life of the fixture. Ensuring everything is properly tightened and functioning will provide peace of mind for your showering needs.
Conclusion
In conclusion, the removal and reinstallation of a Kohler shower handle can be a straightforward process if executed with care and attention to detail. Throughout the guide, we have outlined essential steps, including gathering necessary tools, turning off water supply, and handling the handle components delicately. Proper understanding of these procedures is vital to prevent potential damage to both the handle and the plumbing system. It is important to remember that working with bathroom fixtures requires a certain level of caution to ensure both safety and effectiveness.
Additionally, we emphasized the importance of cleaning all components before reassembly, as this can significantly extend the lifespan of your Kohler shower handle. When reattaching the handle, ensuring the screws are secured without overtightening is essential for optimal performance. Should you encounter any difficulties during the process, consulting the Kohler installation manual or seeking assistance from a professional plumber would be a wise decision. Professional expertise can provide an added assurance, particularly for those who feel uncomfortable with DIY projects.
Ultimately, successful removal and reinstallation of a Kohler shower handle not only enhances the aesthetic appearance of your bathroom but also ensures reliable functionality of the plumbing system. As you undertake this task, take the time to follow the outlined steps carefully; doing so will lead to a satisfactory and successful project, allowing you to enjoy your shower’s features without interruption and maintaining the quality you expect from Kohler products.